
Workflow overview
Images, video, and audio
Generate covers, images, and videos in a chat, edit talking-head videos, handle voiceovers and subtitles, and find the results.
Checked 2026-10-07. Applies to Beav desktop 2.8.13.
Beav has no separate media creation page. Images, video, and audio are all done in a New chat and its right workspace: describe the purpose, platform, aspect ratio, and reference material, and the AI chooses suitable tools. Media tasks usually take longer than text and may use credits or external services.
Images and covers
- Describe the image you want directly, or attach reference images (paste them, drag them in, or drag them from the asset library on the right).
- For Xiaohongshu (RedNote) covers and the cover of a complete image-and-text post, the AI considers 12 types of composition (single image, image with text, comparison, collage, and more) and chooses based on the content. This does not mean it generates 12 images each time.
- For a fixed visual style, use the creation templates below a new chat. You can also turn an image you like into a personal template.
- When making a complete Xiaohongshu image-and-text post, if you have not authorized generating all images at once, the AI first makes two for you to confirm by default, then continues with the remaining pages.
- For an existing image, you can ask the AI about specific content, text placement, or whether labels are covered. It inspects the relevant area without changing the original image.
Video
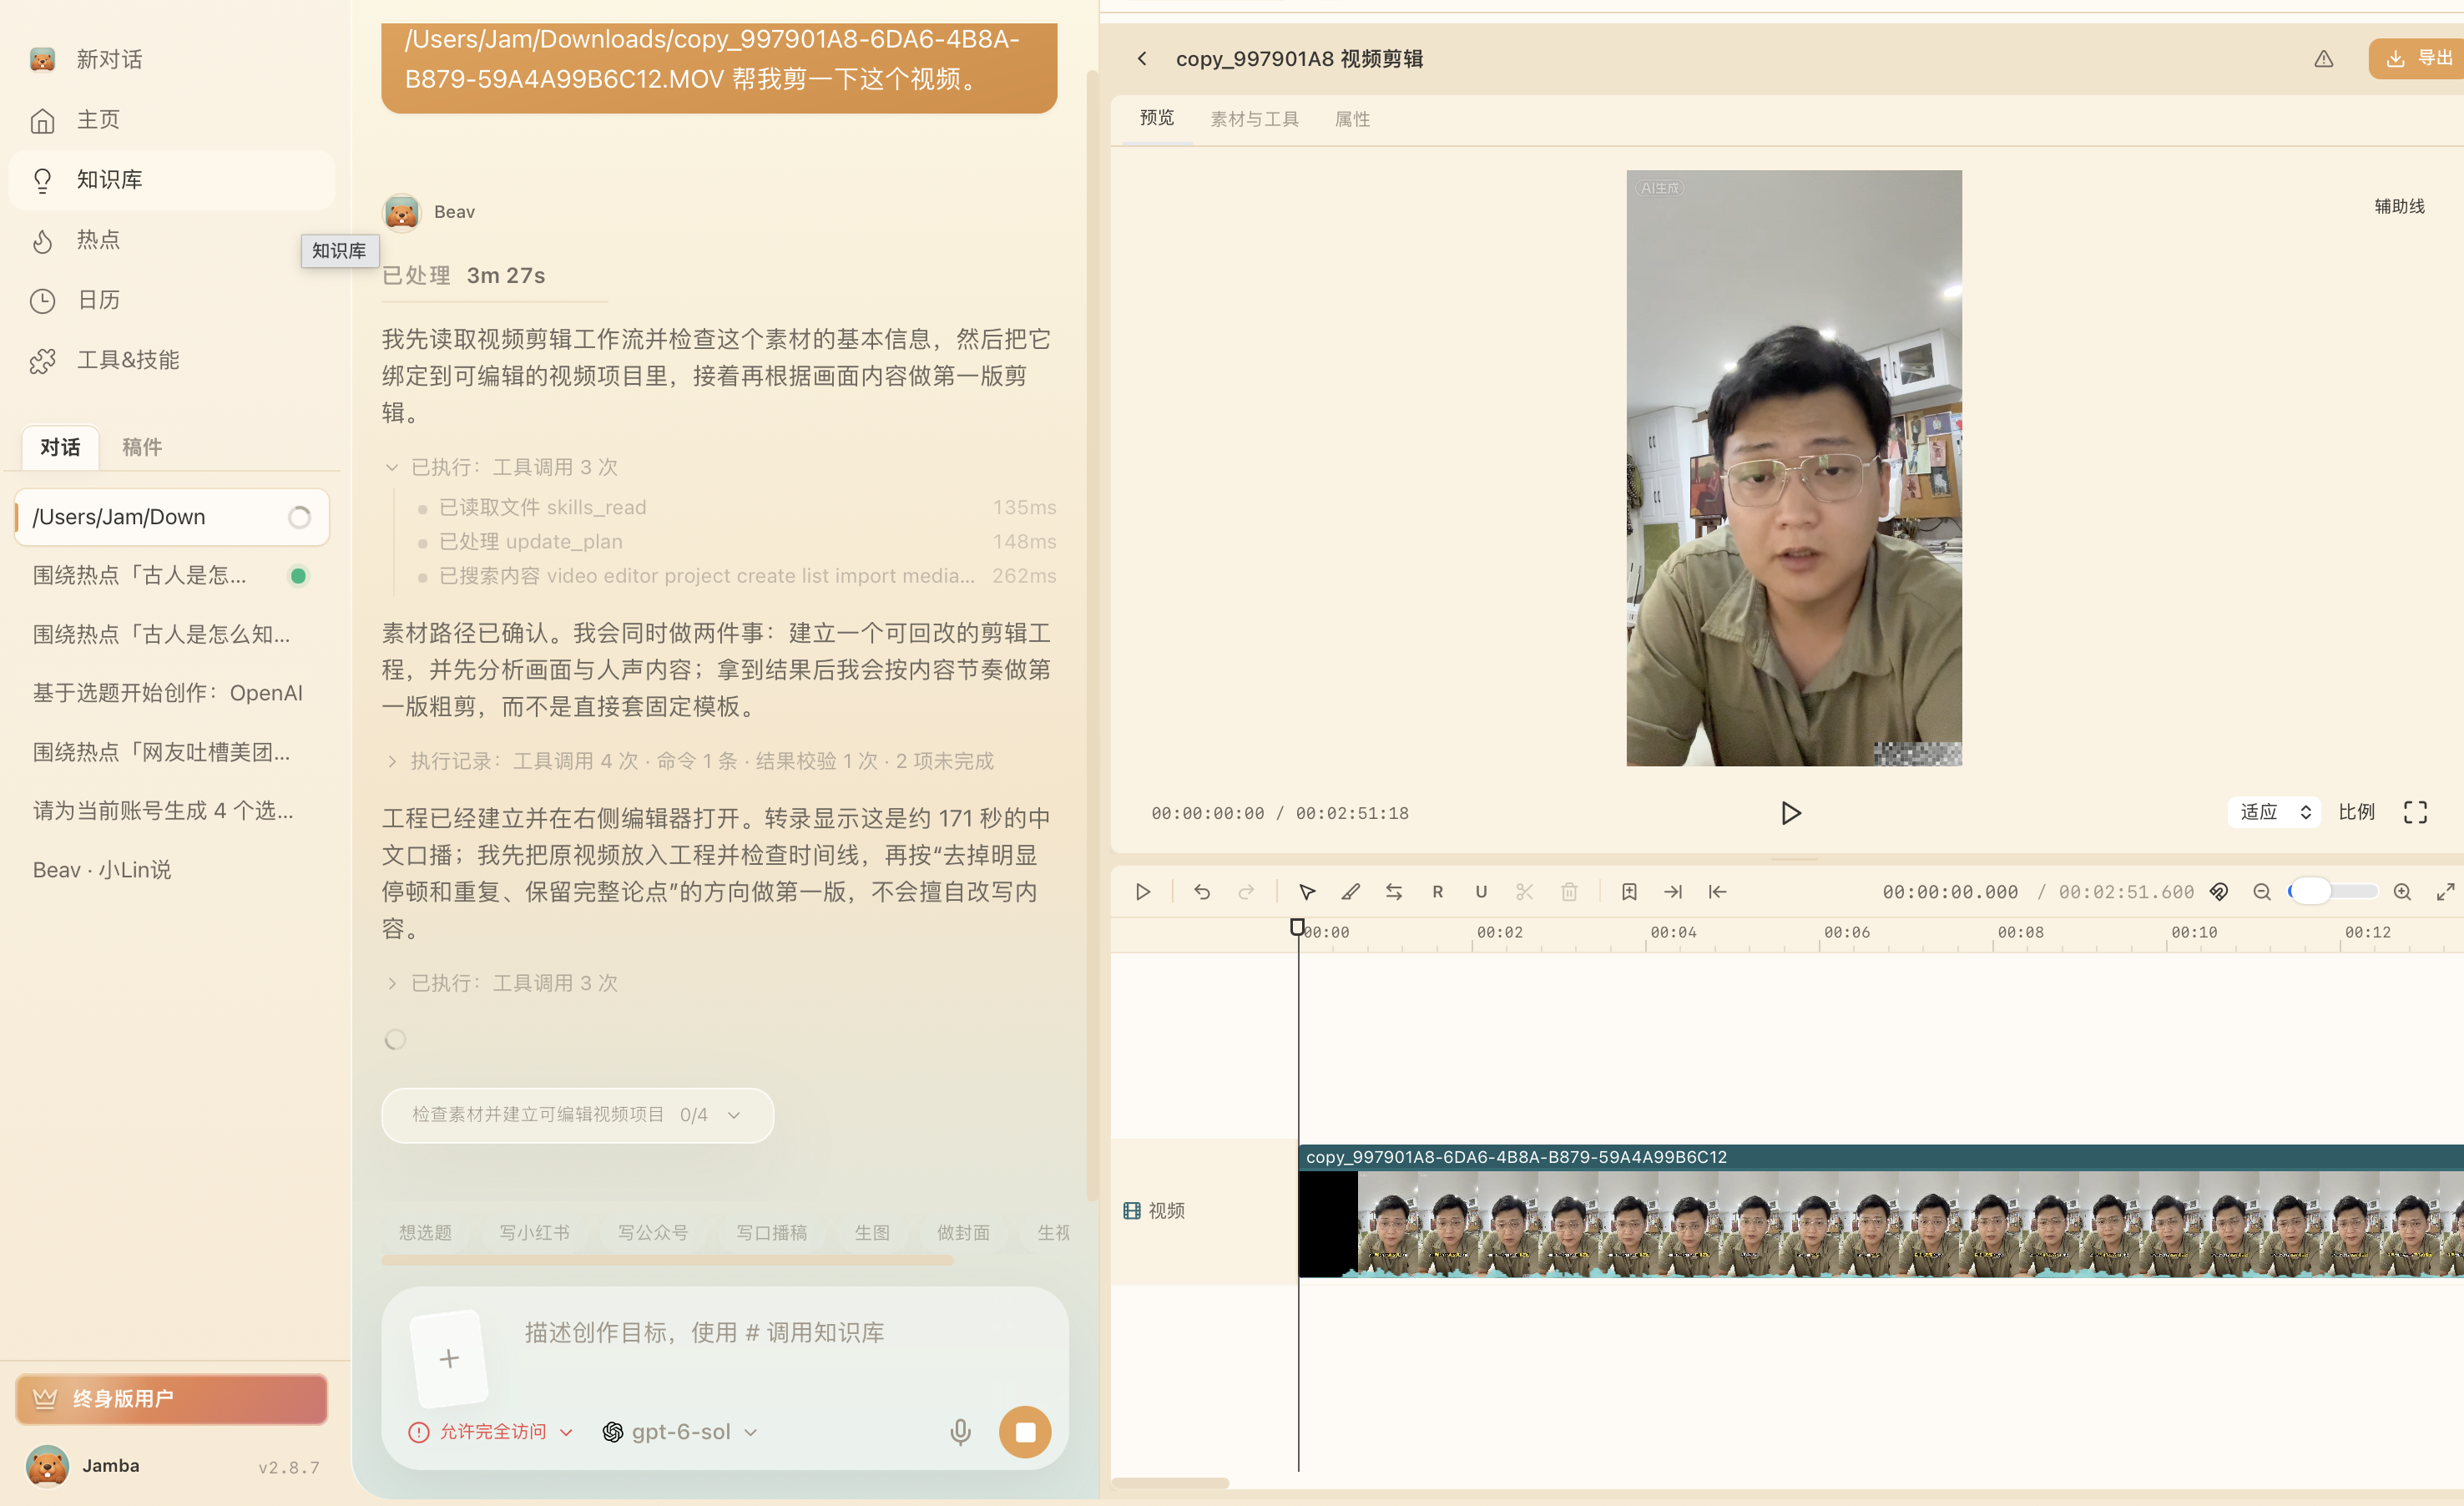
For a talking-head video, provide the video in the chat and state your editing goal. The AI creates an editable project, opens the editor on the right, and handles cleanup, subtitles, supplementary footage, and animation. An open editor only means the project is ready; play through the whole video before exporting. For full usage, see Video editing and smart talking-head cuts.
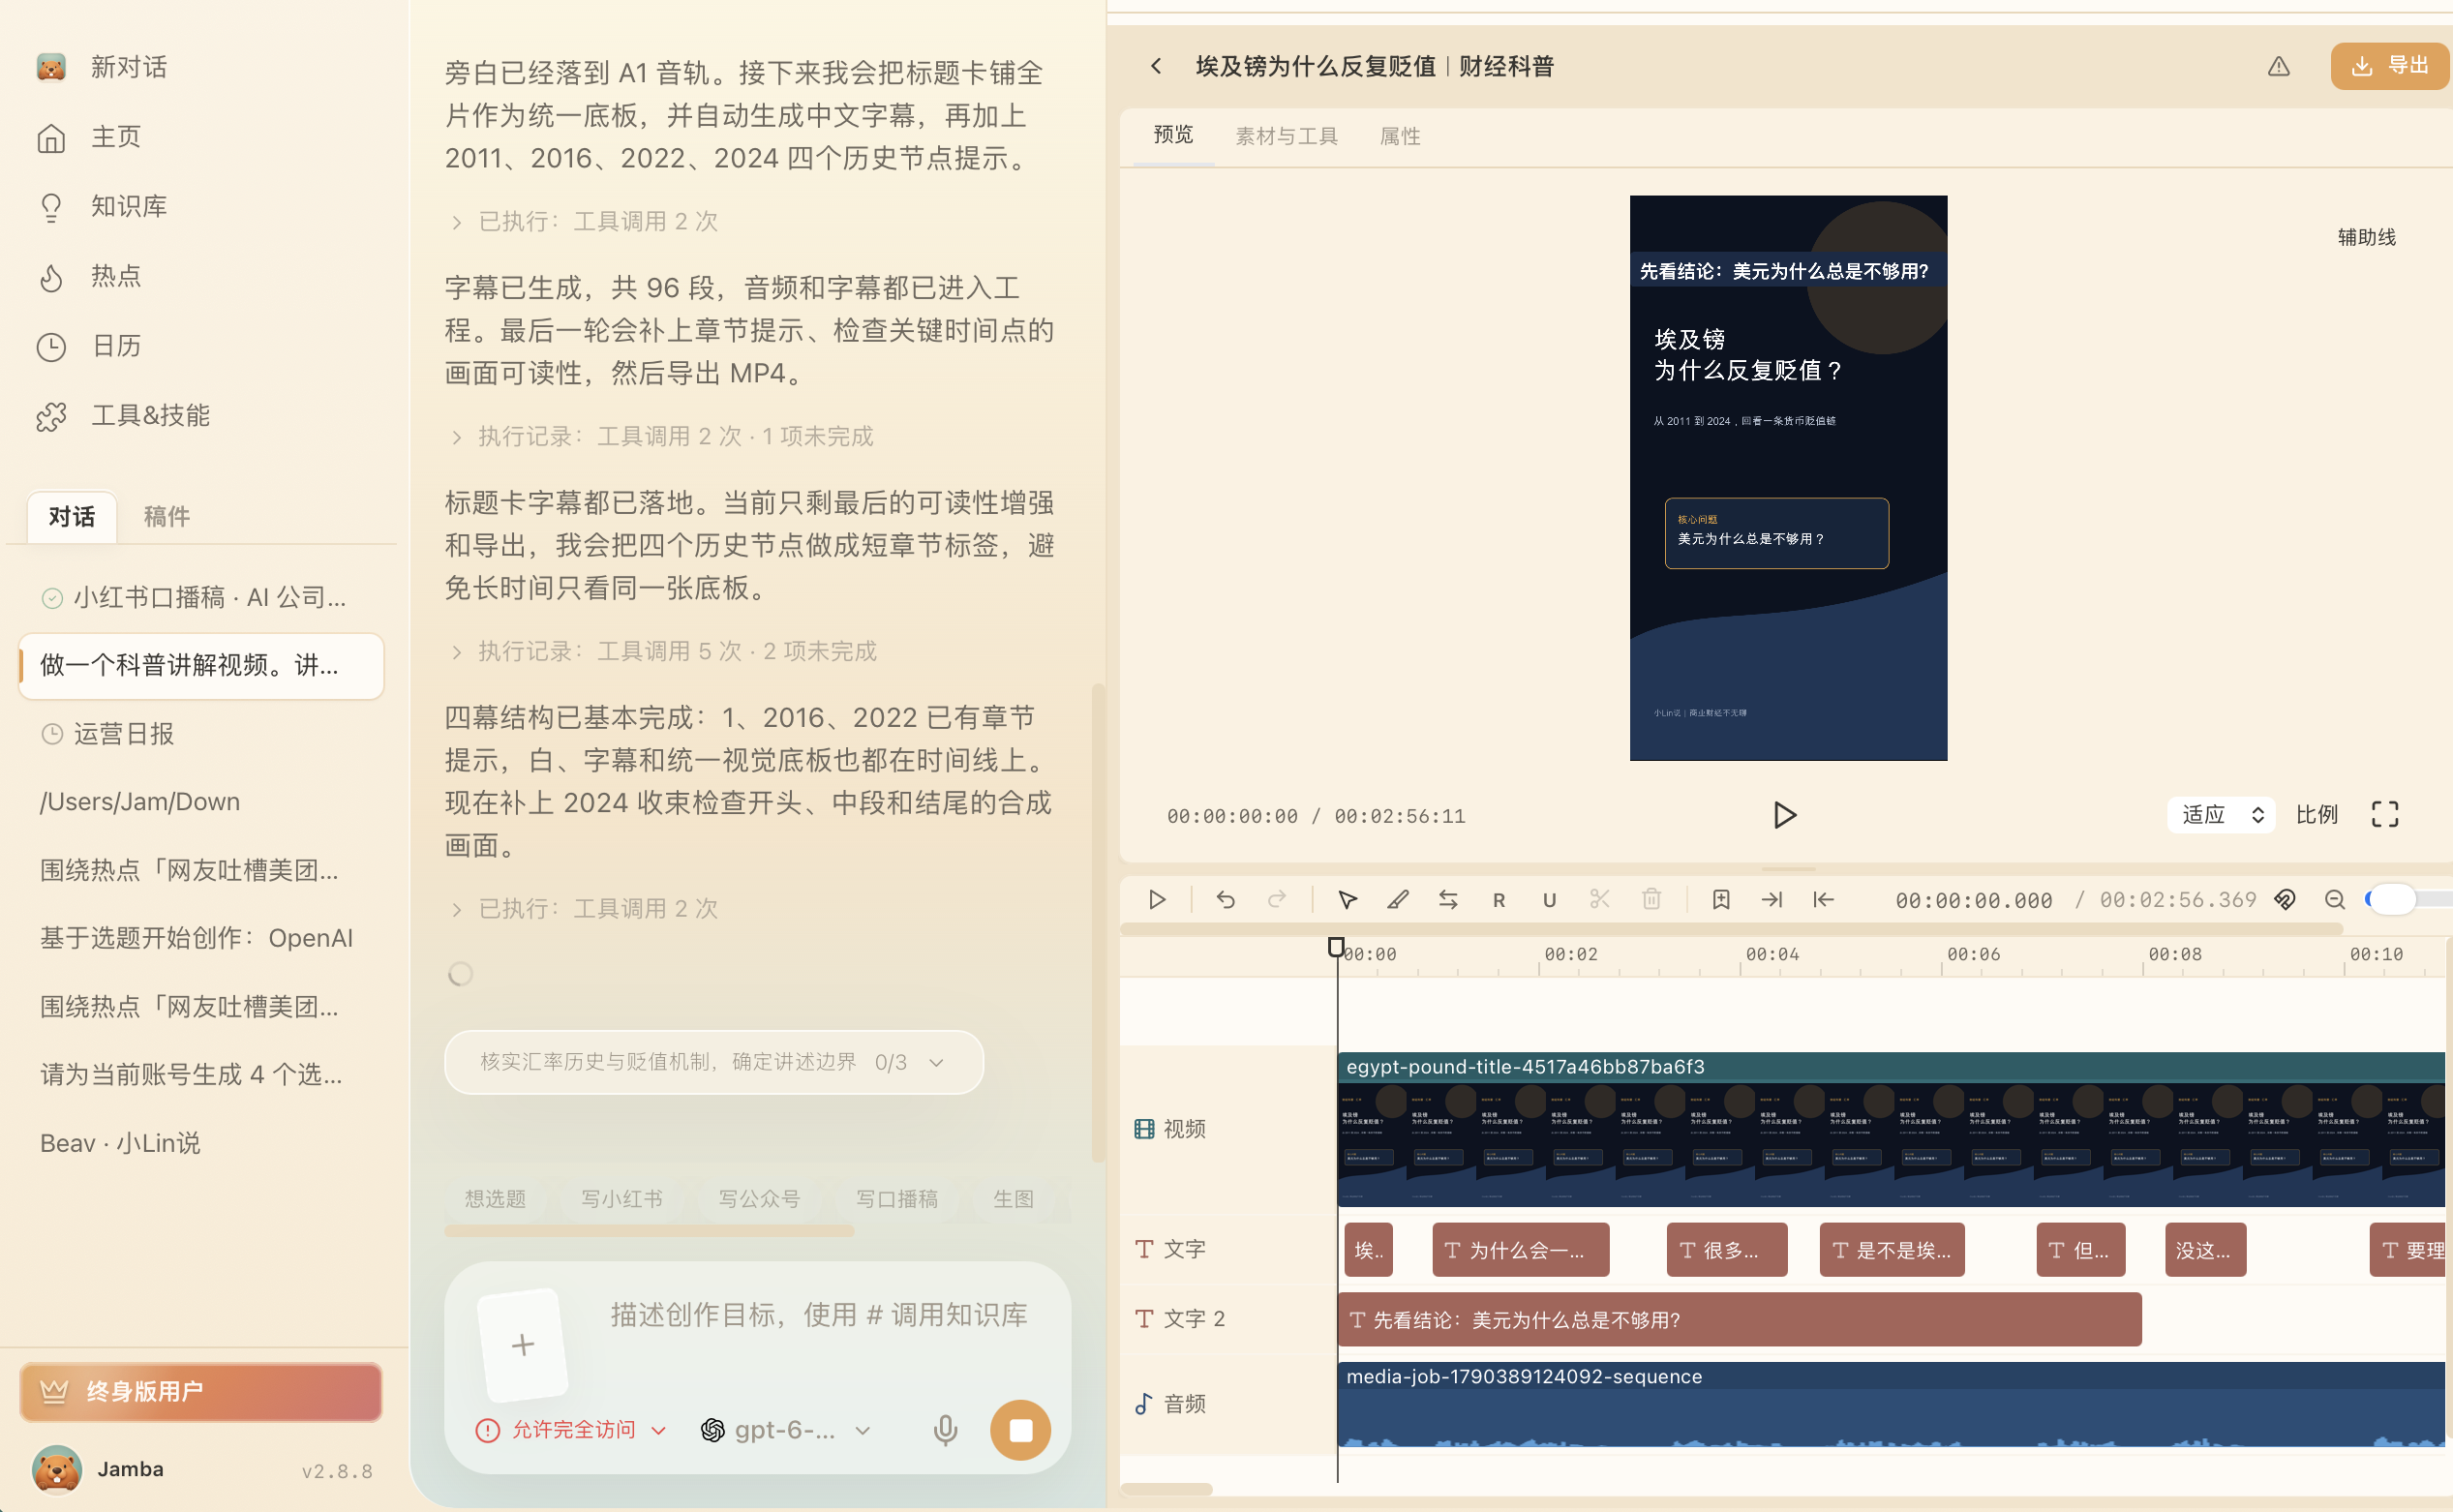
For an explainer video, title cards, subtitles, narration, and chapter visuals can all go on the same timeline. The project below already includes a title card, automatic subtitles, and a narration track. Before export, check the pacing, subtitle legibility, and audio-video sync section by section.
When you ask the AI to turn images, a voiceover, and subtitles into a video, it also uses the editor to create an editable project. Image push-ins, voiceover, and subtitles stay on separate tracks, so you can change text and timing later. To generate a video, use a video template or describe it directly; see Creation templates.
Reference video and speech timing
Provide an authorized local video or a video asset from the current workspace, and you can have the AI look at a specific moment or short interval to answer a concrete question, without creating an editing project just to view the reference. Sampled frames are saved in the current chat and are not automatically imported into the asset library. Still frames cannot replace checking the sound and continuous motion.
When an animation already has a voiceover and a word-level transcript, the AI can locate key phrases by sound and place subtitles, reveals, and visual changes at the matching points. After changing the language or the voiceover, recheck the affected timings.
Audio and subtitles
- Voiceover: tell the AI the script, language, and voice, or open the AI Voiceover mini tool, which lets you set language, voice, and pauses per segment and can also clone voices.
- Transcription: use Transcribe Media to choose a transcription model and export TXT, SRT, VTT, or JSON. To extract transcripts from Douyin, WeChat Channels, or TikTok links, use Extract Video Script.
- Waveform: you can ask the AI to look at the waveform of an audio file or a video's audio track to see pauses and volume changes, without creating an editing project first.
Cost and duplicate submissions
Generation uses credits or external services you have configured, and available parameters vary by model. A successful submission does not mean generation is finished. Do not resubmit the same task just because there is no result yet; check the original task's status first. When a result cannot be confirmed, Beav keeps the failure information and any outputs already produced, and does not generate again automatically. An external Agent that hits awaiting_approval must wait for you.
Find the results
If you switch workspaces, generation tasks keep running in the original workspace and their results are saved there. Open the original chat and go to Manuscripts → This chat on the right to see that chat's attachments, generated results, and asset packages. For images or videos you want to reuse long term, save them to the asset library, or explicitly ask the AI to save them.
Generated
AI-generated images, videos, voiceovers, and editor exports no longer go straight into the asset library. They land in Generated, the item below the divider under the asset library categories on the left. It lists them newest first, and you can search, preview, or drag them into a chat or the editor. The asset library is for things you reuse; most generated results are used once, so keeping them in Generated stops them from crowding the library.
- Save to library: in Generated, hover over a card and click the star in the top-left corner, or right-click and choose Save to library. Generated image cards in a chat also have a star in the top-right corner. Saving moves the file, so chats and editor projects still open it. To send a library file back, right-click it and choose Move to Generated.
- AI search: Beav's AI and external AI tools search only the asset library by default. To use something you just generated, say so, for example "use the image I just generated".
- After updating: files generated earlier that sit at the library root or in the
voiceoversfolder move into Generated once. Files you already filed into other folders, or that a draft uses, stay where they are. Click Move all back to the library at the top of Generated to put them back. - Generated files are never deleted automatically. Assets from video breakdowns stay in the asset library.
Digital humans and reference remakes (2.10.0)
Checked 2026-10-23 against the 2.10.0 release candidate, bundled guide, and source. Real-account generation, cross-platform interaction, and exported results still require runtime validation.
Open Asset library → Digital humans → New digital human, add photos and a name, then record or upload a voice sample. Use only your own likeness and voice or ones you have permission to use. Preview and save; the card shows processing status while the voice is cloned.
Choose the speaking-video action in the character details, or reference the character in a chat with your final script. The AI creates a voiceover and a 480P preview. Check pronunciation, movement, and lip sync before confirming the 1080P version. Preview generation and upscaling are charged separately. Digital humans are unavailable in shared workspaces; generation requires an official account and available models.
After analyzing a reference video, ask for a remake. The digital human replaces on-camera sections; B-roll uses reference footage by default. Before confirming, review the full rough cut in the editor, including narration, reference footage, and placeholders for missing visuals. Remaining visuals are filled after confirmation. Check footage permissions and use your own final wording.
Cloned voices are no longer tied to one speech model. Choose the digital-human audio model in Settings; recording a new sample can update an existing voice. Generated speech is stored separately from background music.